Ipad or Kindle Sleeve Tutorial!

12.1.12 004

Hello all!

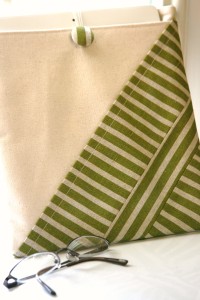
I finally have some time to get some “new project” sewing done so I went through my Pinterest pile of projects to try out (and subsequently pinned a bunch more….) when  I came across this tutorial and thought in would give it a try.  Anna Joy Pham has four options for you to select from for Ipad/Kindle sleeves.  I selected “The Ruby” design.

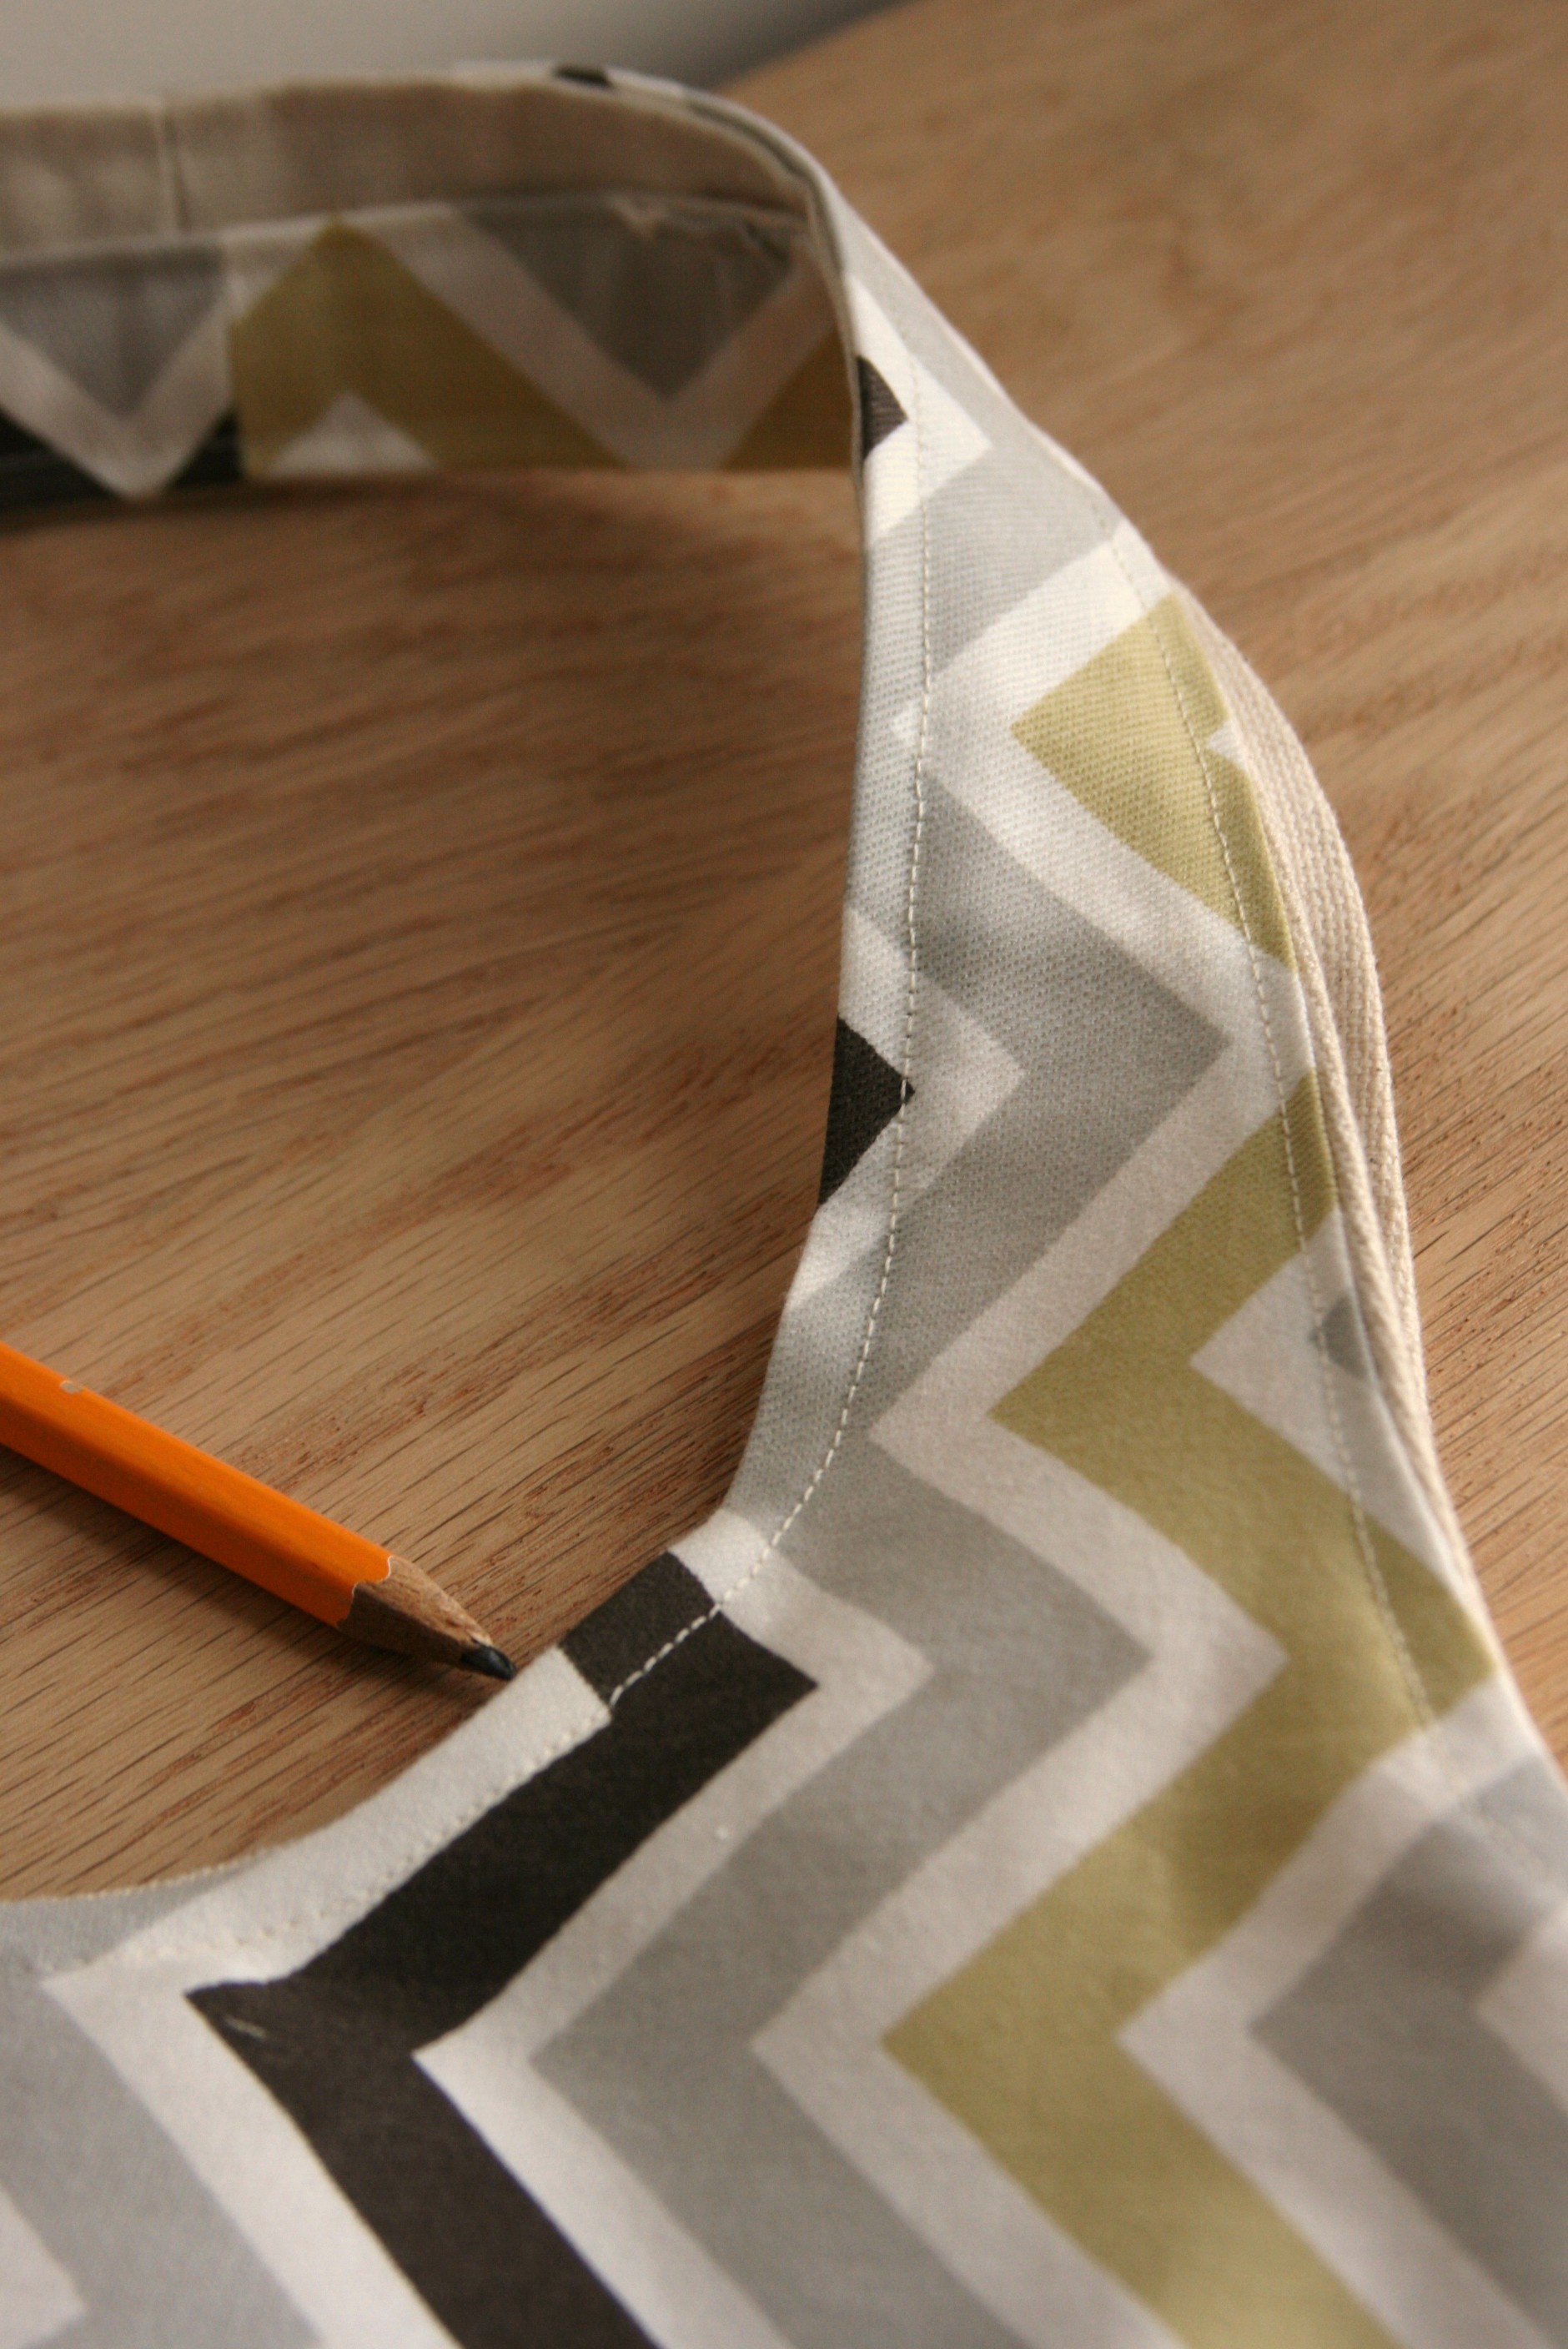
The tutorial calls for three prints but this gorgeous linen print just arrived in the studio today and I couldn’t help but make it feel welcome by putting it to good use right away.

12.1.12 02012.1.12 016

So I cut the fabric two different directions to give it a bit of interest.  I cut the two OUTSIDE piece at 3″ by 13.5″ as she suggested but I opted to cut the inside strip at 2.25″ by 13.5″.

I LOVE making fabric covered buttons and any excuse to do so is more than welcome!

12.1.12 011

Other than that I followed the tutorial closely and it was pretty darned easy.  I always need to do  yoga breathing when I’m turning the item through those little tiny holes by that’s just me.  Next time I will make the suggested 2 inch hole in the inside liner more like four inches….  That’s just me….easier is better.

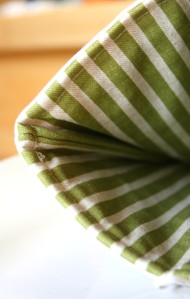
Look how cute the stripes look as a surprise inside!

12.1.12 008

Anyway the options are endless.  Any techie friend (and aren’t they all) would appreciate one of these little goodies.

12.1.12 014

Oh and it took me about 2 hours but I was interrupted about a gazillion times.  The next one shouldn’t take longer than an hour.  I think WAY too hard the first time I make anything.  I’m sure that is what why I can’t just make one of something.  The third or fourth time around the project is so much more fun and I can take liberty with it!

12.1.12 005

Any how.  Make one (or two or three)!!  You can do it.

Happy day,

Jodi

Apron in an hour!

Need a hostess gift or a little something to perk up your time baking cookies?  This tutorial for an apron in an hour is fun and quite easy.  She’s done a wonderful job explaining each step!

Here is one I whipped up the other day from these new fabrics in the shop from the Bella by designer Lotta Jansdotter.

All you need it one fat quarter, for the body of the apron and one half yard for the waistband, hem and ties.

My favorite part about this apron is the extra long ties.  The can be simply wrapped like above or with a fancy bow!

You can make one too!  As the Jona Giammalva’s blog states…Stop Staring and Start Sewing!  Brilliant!

Happy holidays and happy sewing,

Jodi

Crayon Caddies!

Happy Holidays all!
About this time of year I like to whip up a bunch of these crayon caddies for my daughters friends.  She loves to pick the fabrics and the past couple of years she was able to help with the sewing which makes it more fun for us both!  There are a gazillion tutorials out there.  Here is how I make mine.
You will need:
 
Two coordinating fabrics cut 10 inches by 12 inches.  (I found mine here by my fabric designer crush, Monaluna.)
Ribbon
Ruler
Put your two cut pieces right sides together, pin and sew up two shorts sides and one of the long sides. (Usually prints that can go any direction are best.)  Clip the corners where you have sewn to make it lay flat when you turn it.  Turn inside out and poke those little corners.  I use my super fancy rouge chop stick, everyone should have one!  Press.  On the open side fold it in about a half an inch.  I eye ball this because children are not all that concerned about the evenness.  However, if you would like, you can use the disappearing ink pen and mark a straight line to make sure it is even before folding in.  Press.
Open side to the right (or to the left if you made it all upside down… which I have done TOO many times to mention) fold over the bottom about 3-3.5 inches to create the pocket.  Slip the ribbon, folded over, into the open side and pin.  Sew both long sides up.
 
Now mark the outside of the flap in one inch intervals with your ruler and disappearing ink pen.
 
Sew those up and you are all DONE!  Should take about 30 minutes or so.
Darling stocking stuffers or class gifts for preschoolers. Birthday party favors are another favorite for these! Perfect for all those little scraps hanging around! Can be made for markers, pencils, etc.  Once you make one you can adjust it as needed.
My daughter is not satisfied with just six color choices so I make her bigger ones.  Just cut your fabrics 10 inches by 20 inches, sew up TWO long sides and one short side with the right sides together and mark the crayon pocket lines with the pen at 1.5 inches instead.
You can do that for sure!  Easy Peasy!
Happy sewing!
Jodi

DIY Pajama Pants

Part of what I want to do with the blog is to share projects and hopefully inspire you to get creative.  You can make these too! Try these little jammies pants!

Easy for a beginner and a quick fun project for the experienced.

ANYONE who has children knows one day clothing fit and the next day they magically do not!  Amazing!  For me, the combination of a leggy six-year-old along with the hurricane rains blowing outside inspired a little sewing therapy here!  In this case it was to replenish the EVER shrinking supply of pajamas around here.  Image

There are a TON of pajama pant tutorials on the Internet and Pinterest.  Here is one that is the closest to what I did but I did elastic for the waistband.  Easy-peasy.

It’s a quick and satisfying project for the time crunched crafter (aka mommy).  I made a pair in about a half hour or so.  Of course, I can’t just make one so I made four instead. (Pictures of the others coming soon)
How cute would it be to make matching/coordinating Jammie’s for Christmas morning?   Or for gifts!  I even made a little cloud pillow out of left overs of one of the fabrics for a bed time snuggle.
Fabrics from the pajamas I made can be found here and here. Or pick your own here.
Image
Have fun and get creative since they are Jammies be brave!
Happy sewing.
Jodi

1st Birthday Bash

I used to love parties.  I loved to entertain, make fabulous meals, and show people a memorable night regardless of the occasion.  With the addition of 3 kids, party planning certainly isn’t what it used to be! It is still fun to get together with friends and their families, but fancy four course meals have been replaced with pizza, wings, and potluck dinners where everyone pitches in due to lack of time, energy, and wherewithal to come up with new and exciting menus.  So, when my husband uttered the words “What day do you want to have Ben’s 1st birthday party” I cringed, then I cried thinking about our LAST 1st birthday party, our LAST baby…I knew what I had to do.  I went into “crazy crafty mama” overdrive.  I’m sure at least a couple of you out there know what I’m referring to, right? Where it would be easier to buy it, but more thoughtful and cute to make it???? Where thoughts of craftiness come to you in the middle of the night and you must answer the call right away before the thought escapes you??? Where you do things that are, in others eyes, “a waste of your time and energy” but to you, its the “piece de resistance” of the  party???  Yeah, I thought some of you might know what I was talking about!

My Christmas gift from my mother in law was a Cricut machine.  I can’t tell you how much I adore this machine.  Every time I turn that machine on, I’m in awe of the sheer genius of this invention! I’m no scrapbooker, but this thing does so much more! Take a look at what I did with it for the party!


I also made this birthday balloon wreath which I found on www.howdoesshe.com

The tutorial on this calls for 144 balloons…I used 233, then had a contest to see who could guess how many balloons I used…we had fun with that! I had a $5 gift card to Starbucks for the adult’s closest guess, and a helium balloon for the closest kid’s guess.

Turns out, after all of this, my little guy wasn’t really into the party…he seemed utterly horrified by the thought of others oohing and awing over him and thought we were all nuts when we all broke out into song with happy birthday.  I was happy with it all though…everything turned out beautifully and we spent the day with those that mean the most to us.  I couldn’t have asked for a better day or a better 1st year with my last baby…sniff, sniff…


Organic Mod Basics Stripe Blanket

A couple of weeks ago I got a TON of new fabrics in for the fabric shop. Over 40 new organic cotton prints from Birch Fabrics had arrived and I was in FABRIC HEAVEN! Even my five year old ‘helper’ was giddy with the prospect of so many mix and match possibilities!

20120310-230842.jpg

Understandably, I was eager to get to work right away, but first, I had to find a place to put it all! Once it was stored, photographed and posted for sale in the shop, I had one of those quiet, nocturnal sewing sessions that, when they go well, makes it much easier to tolerate dragging my tired behind through the following day. I had pinned this little ‘lovey’ on Pinterest and now used it as inspiration.

I adjusted the measurements as I was using considerably less then the 12 prints she did and I was making a smaller blanket, as opposed to a quilt. I backed mine with this incredibly soft organic fleece I have in the shop; super buttery soft.

I cut SIX 1.5 inch strips of the organic cotton white. I cut them to the length of the fabric.

I cut SIX 4.5 inch strips of each of the prints I wanted to use. In my case two strips of each Dottie, Abacus and Solid.

I cut ONE 9 inch strip of the Elephants from Ellie Farm.

I put them in the order I liked and started to sew the white strips to the prints.

I pressed as I went, because that’s how I sew, but have heard from many experienced quilters you can skip that part until the end if you prefer. I kept sewing until I had the whole top assembled.

Once complete I folded it in half each way and used my large ruler to make all of the edges even and straight. Once the top was complete I laid the organic bamboo batting on the work table (use the floor if you don’t have a large work surface), laid the fleece (fuzzy side up) on top of it and then placed the top of the blanket face down on top of those. Pin. I did a rough cut with my trusty sewing scissors around the edges. Since you have made the edges of your blanket straight and wonderful (right?) you can use the edge of the blanket top as your guide while stitching.

When I sewed them all together I left an 18 inch opening and sewed around the rest of the blanket. Once the sewing was complete I took my large ruler and cut all of the edges down to 1 inch from the seam and then trimmed the corners. I turned it right side out, using my super high tech….orphan chopstick… as a poker to make the corners square and pressed it firmly all the way around. Once all was pressed I top stitched around the top edges and along the print side of each strip . The end result is a kind of modern, cheater quilt in a fraction of the time of a traditional quilt. As I have mentioned in previous posts, I like faster better. 🙂 The thing I love most about this type of blanket is it can be broken down into smaller increments of time if, like many of us, you are only able to work in half hour sittings. It’s also quick and easy just to pick up where you left off.

20120310-230950.jpg


If you need more instruction, or courage, to give this a try there are a gazillion blanket tutorials out there if you Google but here and here are two that generally have the same idea.

Tutorials aren’t really my strong point so if you have questions just ask. 🙂

Happy crafting,

Jodi

My love for felt

Felt is actually one of my favorite things to work with. I will find just about any excuse to incorporate it into my sewing and am hardly ever disappointed with the results. Its cheap, versatile and just plain fun! Around Christmas, I stumbled upon this awesome tutorial 33shadesofgreen.blogspot.com/2010/11/handmade-holidays-felt-wine-sleeve for a felt wine bottle sleeve and I must have made a dozen of these puppies for friends, family, and my husband’s coworkers. It was simple and there are a million ways to dress it up. I loved this tutorial so much I even tried it with cotton but wasn’t thrilled with the results. There didn’t seem to be a good way to cut the hole in the flap that goes over the neck of the bottle and still have it look pretty. The tutorial is perfect for felt and you can even change it up a bit so the seams don’t show on the body of the sleeve but I prefer to show the seams for more of a shabby chic feel.

Here’s a photo of the one I whipped up last night. I used a button kit for the first time        and I have to say, loads of fun! Once you get one of these kits, you will NEVER throw away another scrap of fabric! I don’t like to monogram mine because I like the idea of the receiver “regifting” the wine bottle bag.

You can see more felt projects at http://www.etsy.com/shop/KelsCozyCorner

Reversible Bags!! Make one!

The blog has moved to SewFineFabric.wordpress.com Come on over and see what is new!

I’m always looking for new and inspirational projects. And when I’m not doing that I am likely looking for new and lovely fabrics. Thank goodness my obsessions coincide!! Recently, I discovered these gorgeous home decor prints from Premier Prints and could not wait to get my hands on them for the fabric store (http://www.sewfinefabric.Etsy.com). Ordered immediately!

Image

When they arrived I stared at them for a long while…ok days. To be honest I sometimes, in the quiet of night, when the family is all tucked in and cozy, pour myself a glass of wine and stare at fabric. Eventually, I remind myself that I need to stop staring and start sewing. A couple of days later I remembered I had pinned this reversible bag tutorial on Pinterest that would be perfect. So, perhaps, all that staring pays off after all…or at least that is what I tell myself. 🙂

Here is the tutorial:
http://verypurpleperson.com/2010/04/making-reversible-bag.html

It was pretty simple and you can make one too! The first bag took me about an hour and a half of leisurely sewing. As I made more I found that they took about an hour each.

You can find the fabrics I used and more here.
http://www.etsy.com/shop/sewfinefabric?section_id=11036844

I made a slight adjustment to make turning the bag right side out a little less frustrating. On step 3 I sewed three of the straps up to where she indicated in the tutorial and left one strap open just after the turn. Here is about where she suggests you stop. Do this for three straps.

Image

And here is where I stopped on the fourth strap.

Image

Otherwise, it was too difficult for me to pull the bulky fabric through the incredibly small hole. Perhaps it was because I used home decor weight fabric instead of lighter fabric. Or perhaps it is my “I want everything to be easier” attitude…. This adjustment did not make it any more difficult to complete the bag when top stitching but made it SO much easier to turn the bag. I like easier. 🙂

And of course I couldn’t make just one.

Image

Image

Image

Image

Image

In fact I am sure there are more to come.

A half a yard each of coordinating fabrics will be plenty to make a pretty bag. So go ahead and make one. You can do it!

Happy sewing,

Jodi

The Cleaning Conundrum

Cleaning a house that is busting at the seams with boys (even the dog is male) is a challenge that I have struggled with for the last 5 years.  The more people you add to a household, the more junk to collect dust, create clutter, and just make a mess in general! The bigger the dog gets, the more hair he emits.  The bigger the boys get, the dirtier they get! I’ve often felt that I don’t know where to start, and once I start, I can’t keep up.  Short of throwing my hands in the air and surrendering to the mess, something had to give.  I had to come up with an organized solution to help me stay on track and feel a little less plagued by the chaos that is my lovely home.  For me, this is a once a week solution…one that requires that a sitter come and occupy my boys for a couple of hours while I buckle down and get dirty.  During the week, I just try to keep up on things the best I can, stay positive about what I’ve accomplished, and not get bogged down in the details of what I have yet to complete.  If I’ve completed a task that is on my chart, I can check it off when my cleaning day comes or just do it again! My choice…easy, simple,  ORGANIZED (yay!)

Supplies

1 book binder ring

Cardstock-1 for each room in your home (I used 4.5×6.5 cardstock matstack found at Joanne’s)

Printer

Self Adhesive Laminating Sheets (I used Avery 9×12, there are 10 in the pack)

Scissors

Dry Erase Marker

Step 1:

Take some time to walk around your house and make a list of all the things that you need to do in each room to consider it CLEAN.  Here’s an example of my master bedroom list…

Step 2:

Once you’ve gone through all the rooms in the house, type them out on a word document for the size cards that you have.  I had to change the size to a custom setting and print my cards out through the back feeder one by one.   There were only 11, so it wasn’t so bad.

Step 3:

Once that is done, take a piece of self adhesive laminating sheets and peel off the backing.  It is best to try to do this on a clean workspace.  You should be able to lay two cards on the sticky side of the sheet and then take a second piece of laminate and place it on top sandwiching the card in between the two sheets.  It doesn’t matter if the two laminating sheets match up perfectly as you will cut the cards out in  step 4 anyway.

Step 4:

The next step is to carefully cut your cards out of the laminating sheets and punch a uniform hole in each one.  Slip your book binder ring into the hole and THERE YOU GO! EASY PEASY!

Keep your cards and your marker attached to your cleaning caddy or bucket so they are always handy when your cleaning day comes.  Check off the tasks as you get them done.

So there it is!  Turn up the radio and rock out with your mop out!

Hello and welcome!

“You can do that.”

If I only had a dime for every time my mother and I have said that to each other…. Well, I’d have a LOT of dimes! Mom and I spent much of my pre-mommy years wandering around craft fairs and the quaint small town shops dotting Northern California’s tiny tourist villages. When we came across something we felt was worthy of our attention we would often gleefully declare, “YOU can do THAT!” in a hushed whisper. However, once back at home, Mom was always significantly more likely to actually try out an idea than I was. A crafty pioneer!
“Martha” earned her knick-name because (like the real Martha) she could take any project on and arrive at success….eventually anyway. I didn’t get interested in earnest until I had matured enough to have the patience for all the screw ups that happen while trying to make stuff….needless to say, over time, the seam ripper and I have become close friends.
Mom has been gone nearly two years now and it was after she passed I took to handcrafting things with zeal. Mostly to keep my hands busy while my heart mended. I had heard work was good for grief and took that to an extreme. I’m hooked. I can’t seem to be able to get enough of trying out new techniques and learning all I can. Always a new project on the horizon.
Kelly and I wanted to have a place for all of those who are less then confident about taking on a handcrafted project. We are here to show you our triumphs and failures and to hopefully, sometimes show you the way to triumph yourself. With all that said I want to invite you to see my creations at CrzyBagLady.Etsy.com or be inspired to create your own from the fabrics in SewFineFabric.Etsy.com
So sit back, relax and laugh along with us (or at us).

Jodi Walter Jones

Crzy Bag Lady Designs
Crzybaglady.etsy.com

Sew Fine Fabric
Sewfinefabric.etsy.com

amaryllis log

create something

Pincushion Treats

Creating treats, one stitch at a time

skirt as top

suō ergo sum :: i sew, therefore i am

charlottesfancy.wordpress.com/

Favorite Things, Family Life, Fun Projects

the searched - searched

...two chics trying to be crafty....

smallestforest.wordpress.com/

Express yourself. It is later than you think.

M&J Blog

...two chics trying to be crafty....

Sue Schlabach

MAKER OF ART WITH INK, PAINT, PAPER, OLD PRINTS AND CANVAS

Project Palermo

Fixing Up a Chicago Bungalow

SEW KATIE DID

because thread is the best glue.

Sowelu Studio

Living A Life. . .Well Crafted